

I really like Flow’s ability to listen to Twitter. Some time ago, I set up a flow to listen to anything related to my Twitter handle, BizIntelligist. The initial design would just capture tweets that I deemed interesting and email them to me. Then, the cognitive services became available, so I added a step to the flow to lookup a sentiment score for the tweet before it gets emailed to me.
As I was getting my tweet emails throughout a day, I started to think that this solution would not work very well for a large company with a well-known brand (like Coke or Harley Davidson) – the amount of emails would quickly become overwhelming. A better approach would be to persist the tweets into a file or a database and then set up some sort of a reporting mechanism on top of that (and may be still send an email out when the sentiment score is very low so a company can timely react to a negative post).
I decide that the most robust and economical way to do this would be to use Azure Data Lake Store. Unfortunately, it took me a little while to figure how to populate the required information to configure this task properly and since I could not find any articles about how to do it correctly on the Internet, I decided to write this blog and detail it out (it is trivially simple but not very intuitive)
As you can see in the image below, there are only three fields that need to be populated for the Data Lake Append File action to run:
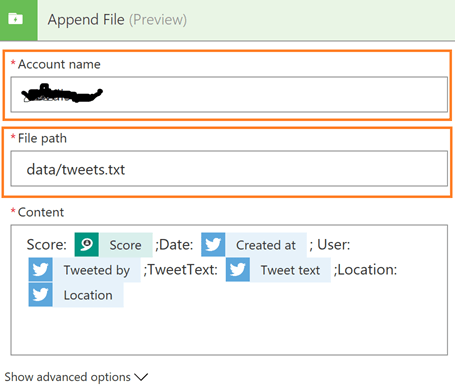
The Content field is populated just like any other Flow content field, so I will not spend too much time on that. However, getting the Account name and File path populated correctly took some trial and error time.
In order to configure those two fields, you need to first go to http://portal.azure.com and find the Data Lake Store that contains your file. The name of this Data Lake Store is the Account Name. After you open up your Data Lake Store, navigate to the folder that contains the file that you will be writing into. Then, click on the three dots to the right of the file name, and then click Properties.
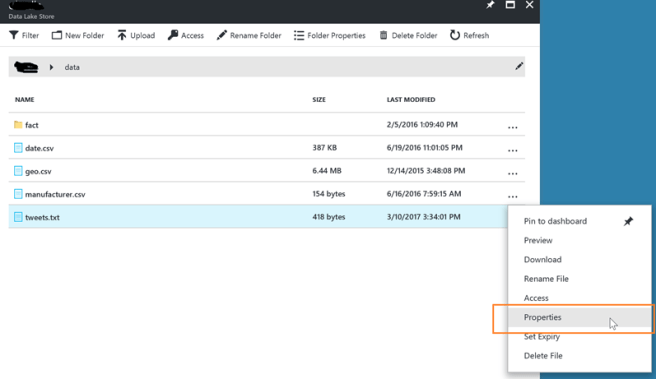
The PATH field contains the information that we need to populate the File Path in the ADL File Append task.
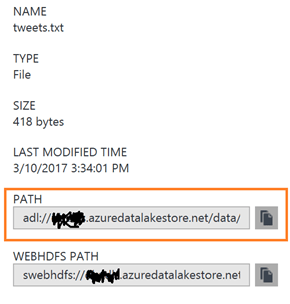
The value in this field will look something like this: adl://YOURADLSNAME.azuredatalakestore.net/data/tweets.txt
You need to take the highlighted part of the path and paste it into the File path box of our flow task: data/tweets.txt.
The very last thing that took some figuring out was being able to start each appended tweet on a new line. The way to do that is to simply go to your Content field, click at the very end of the string that you are trying to compose and hit Enter. This will insert a carriage return character at the end of the line so that every appended record starts on a new one.
