
Do you have to be a developer in order to implement a solution that ties together Power BI and Azure Data Lake? I argue that you don’t. However, there are a several things that you need to be familiar with before you get going. Therefore, I decided to cover several of them in this article. For now, I will keep the discussion at a high level as we are working on several additional posts that will cover some of the specific challenges with this scenario in more details.
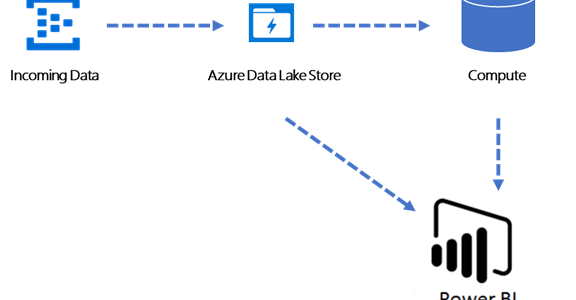
The overall objective of this self-service exercise is the following:
- We have a large amount of data (let’s assume it’s a bunch of large CSV files for simplicity sake) that we would like to analyze
- We would like to load these data into our Azure Data Lake Store (ADLS)
- Depending on the size of the data set that we would like to analyze we want to connect Power BI directly to the ADLS or we may need to load some data into a “compute” asset such as a table in Azure SQL, Azure Data Warehouse, Hive, Spark, etc. so that we can run queries on it before data gets loaded into Power BI
This is a fairly simple and common scenario for someone who has development background and is well familiar with Azure stack. However, if you are more of an analyst than a developer, let’s take a look at the specific steps that you need to be aware of.
How do I load the data in to the Data Lake?
Assuming that you already have the Azure Data Lake Store provisioned and configured (including directory structure considerations and security), we have several ways to “hydrate the lake”. The first one is fairly simple, all you need to do is to navigate to your Azure Portal, open up the ADLS that you would like to work with and then click on Data Explorer

This will open an interface that is very similar to a Windows Explorer
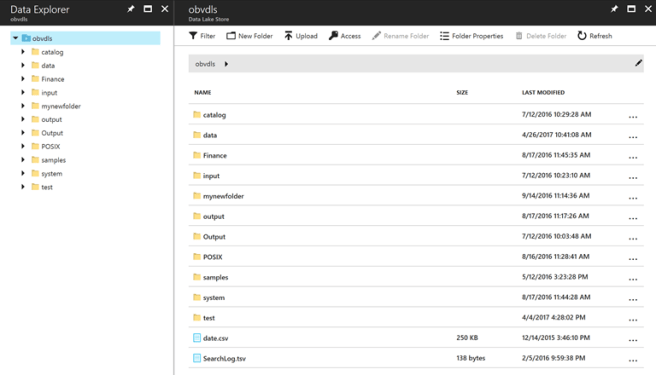
You can then use Upload, New Folder and other options of the interface to move and organize your files there.
This approach would have been perfect for a self-service scenario; however, there is one caveat to be aware of, you cannot upload files bigger than 2Gb (at least this is the limitation at the time of this writing). If your individual files happen to be larger that this limitation, you will need to write a Power Shell script to upload the files (we will have a blog post on how to do this shortly)
How do I load data into Compute?
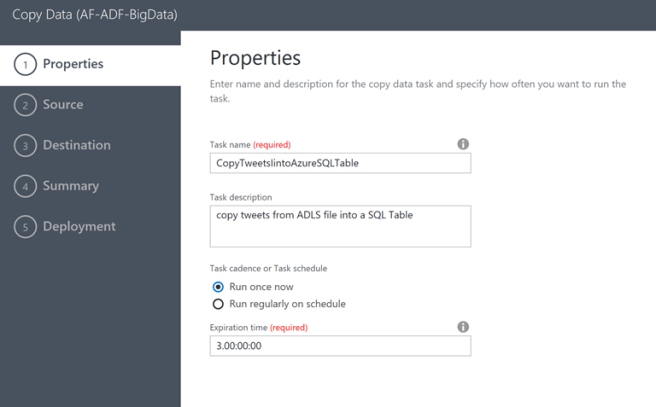
From the self-service perspective, the best way to move data from ADLS into your compute asset (let’s assume it’s an Azure SQL Table for the sake of simplicity) is to use Azure Data Factory’s Copy Data wizard. The only caveat here is that you have to have Azure Data Factory and the destination SQL table set up and ready to go before you use the wizard.
The first thing to do is to navigate into you Data Factory and then click on Copy Data tile

This will launch a new tab in your browser and will ask you to populate fields required to complete Step 1
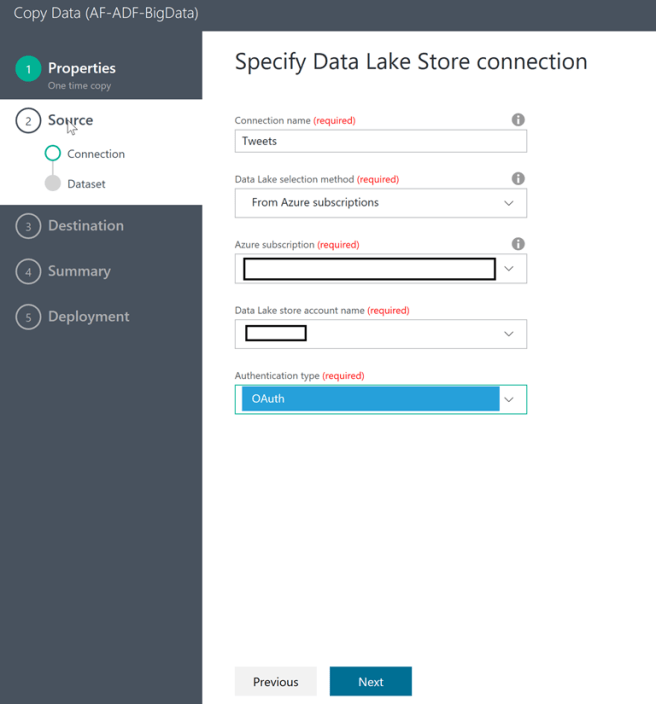
In Step 2 you are required to select the source of the data being moved (in our case Azure Data Lake Store)
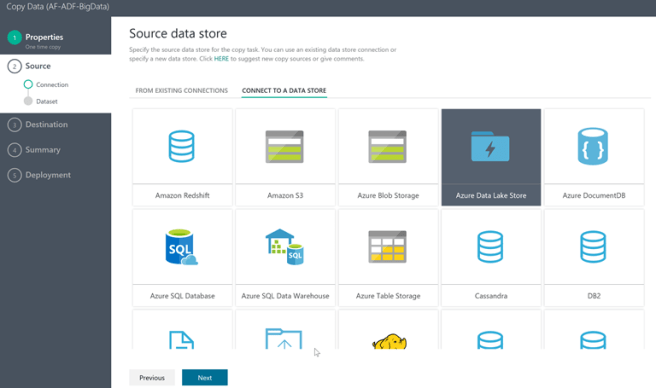
Then you need to enter the details and click Next
Then you can navigate to the file that you are trying to move and click Choose
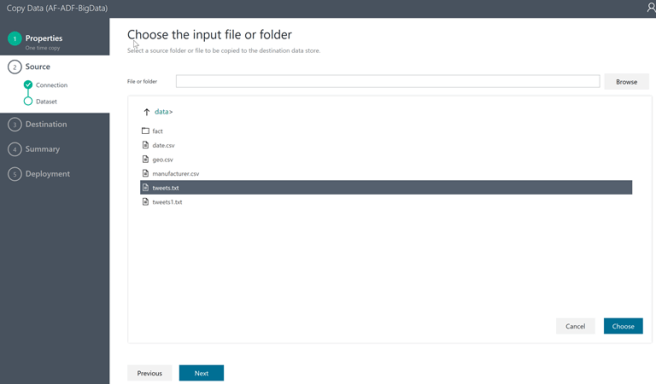
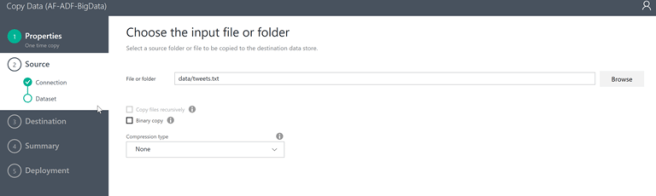
Leave the compression type as None if the file is not compressed and click Next
The next step allows you to validate your file formatting settings. You can review it and make changes if necessary and then click Next (in my case, column delimiter is Semicolon and row delimiter is Carriage Return + Line Feed)

The next step allows us to select our Destination, we will pick Azure SQL and click Next

Feel out the information necessary (I will blank mine out in the screen shot below) and click Next

Now you can select the destination table and review mapping and schema information (click on a drop-down icon to see details) and then click Next

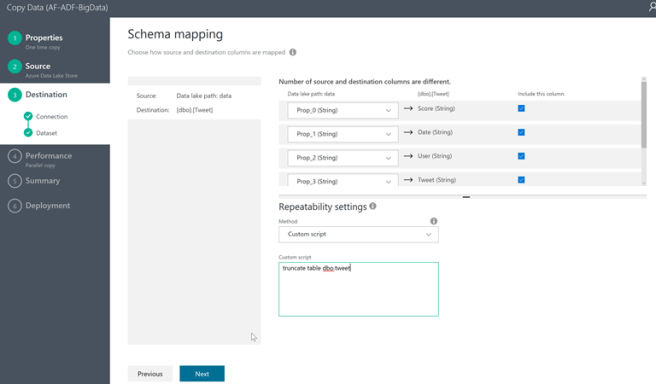
Now we can review how our text file maps to the SQL Table and click Next (you can also change the Repeatability Settings from None to Custom Script and type in your SQL to delete the contents of the table if you intend to overwrite it with every load)
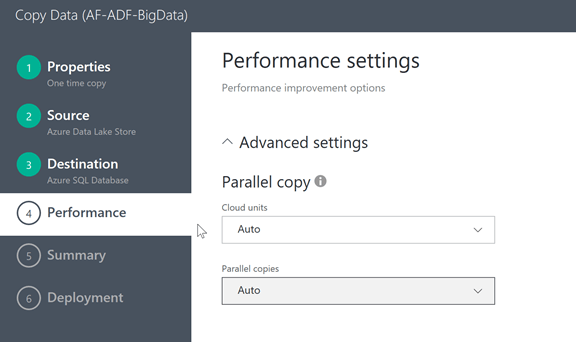
Leave the Performance Unites at Auto in the next section and click Next
Click on Authorize button in the next screen and enter you credentials when prompted then click on Next

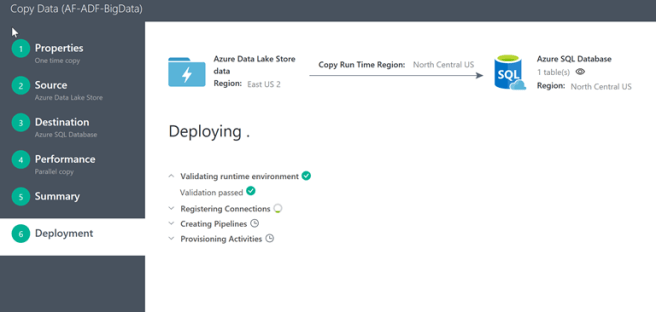
Now you can watch the wizard go through the deployment steps
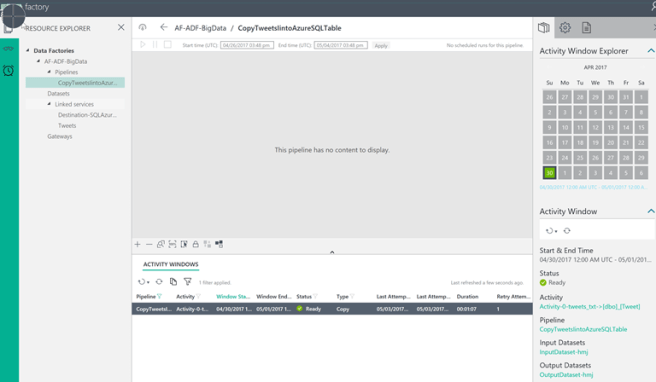
You can click on the “Click here to monitor copy pipeline” to see the results

If everything went well, it should look like this
Having gone through all these steps, one might ask if this approach is simple enough for an analyst. I think so… but just barely. It could definitely enjoy a lot of simplification. This approach also assumes that the analyst will have necessary support by the IT to spin up and configure all of the required Azure resources (ADLS, ADF, Azure SQL, etc.). it is also critical that the analyst has access to a resource who can help him or her troubleshot any potential issues as they arise (several options that we have to populate in the wizard can cause hiccups if they are not populated correctly)
Loading data into Power BI
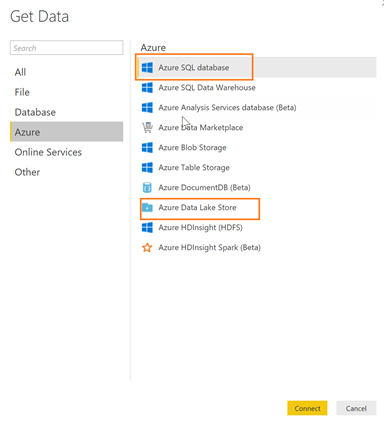
You can now use Get Data in Power BI to connect directly to the ADLS and pull the entire file or to connect to Azure SQL and run a query against the table if the file is too large and you need to massage it before it gets downloaded
We will be extending this post with additional articles that will drill into additional details, so please stay tuned!

I wonder if there is an easy way to do some data manipulations (assume its a small dataset) before its loaded into Azure SQL. Like running an R script (and not use HDInsight as its too expensive).