
Following link looks into various options available to scale compute power in Azure SQL Data Warehouse. Next question that one would ask is, how do I automate the capability to scale the compute power. In this article, I answer the question using Azure WebJobs.
Azure WebJobs provide an easy way to run scripts or programs as background processes in the context of an App Service web app, API app, or mobile app. You can run executable files such as as cmd, bat, exe (.NET), ps1, sh, php, py, js and jar. These programs run as WebJobs on a schedule (cron) or continuously.
I have created an executable script using PowerShell.
## - Prepare PSCredential objects:
 $MyAzureName = "xxx@mycomapny.com";
 $MyAzurePassword = ConvertTo-SecureString 'password' -AsPlainText -Force;
 $AzureRMCredential = New-Object System.Management.Automation.PSCredential($MyAzureName, $MyAzurePassword)
 Login-AzureRmAccount -Credential $AzureRMCredential
 Select-AzureRmSubscription -SubscriptionName "YOUR SUBSCRIPTION"
 ## -- Use this to Scale
 Set-AzureRmSqlDatabase -DatabaseName "MySQLDW" -ServerName "MyServer" -RequestedServiceObjectiveName "DW1000"
Edit the script by entering your Azure credentials, Subscription, Azure SQL Data Warehouse server and database information. Save the file as a Powershell (.ps1) file. Add this file into a zip, since WebJobs takes only zip files as inputs.
Now we have the script ready, let’s work on creating Azure artifacts to schedule it. First we need to create a Web App. This Web App will act as a container for the WebJobs we create.
In the browser open https://manage.windowsazure.com. This is an earlier version of Azure portal. Functionality we need is not moved to new version yet.
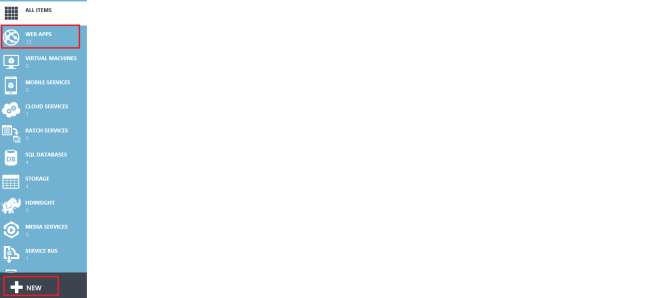
Once you are logged in, from the left panel select WEB APPS and select NEW in the bottom left corner.
Using Quick Create, create the WEB APP.

Navigate to the newly created web app, select WEBJOBS from the top menu.
Click on ADD A JOB.
In the dialog, give the job a name. Browse and select the zip file you created earlier.
Notice that you have options to execute the jobs continuously, on demand or on a schedule. Select Run on a schedule from HOW TO RUN dropdown.

In the next screen, set the schedule.
Once the job is scheduled, you can click on the LOGS link to look at the logs.
This is awesome, but I have not figured out a way to edit the job once it is created.
